Highlife

Filed in Cellular Automata | Game of Life Leave a comment

In Conway’s Life the rules for the birth and death of cells are simple:

1. Any cell with fewer than two live neighbors dies
2. Any living cell with two or three living neighbors lives
3. Any living cell with more than three living neighbors dies
4. Any dead cell with exactly three living neighbors becomes a living cell

Highlife is a cellular automaton similar to Life except for the addition of a birth rule. Whenever an empty cell is surrounded by 6 live cells a live cell is born so the rules are:

1. Any cell with fewer than two live neighbors dies
2. Any living cell with two or three living neighbors lives
3. Any living cell with more than three living neighbors dies
4. Any dead cell with exactly three living neighbors becomes a living cell
5. Any dead cell with exactly six living neighbors becomes a living cell

Another way to represent this is to use a shorthand notation like the following:
Life B3S23 – Birth 3 neighbors, Survive 2 or 3 neighbors
HighLife B36S23 – Birth 3 or 6 neighbors, Survive 2 or 3 neighbors

The addition of another rule may seem like a small change and many of the same patterns exist in both Life and HighLife but there is an interesting difference. A small simple pattern known as the replicator exists that creates copies of itself every 12 generations. As far as anyone knows a small replicator like this doesn’t exist in Life. So, for that reason, I’ve decided to modify my code so that I can run either Life or HighLife.

Doing so was fairly easy and only involved changing a few lines of code

def updateState(currentState):
    '''
    This function is where the actual game of life calculations happen    
    for each cell
    '''
    nextState = copy.deepcopy(currentState)
    #deepcopy could be moved to gol.py. <1% runtime though
    neighborCount = scipy.signal.convolve2d(currentState, config.neighbors, 
            mode="same",boundary="wrap")
    #B3/S23
    #nextState[np.where((neighborCount != 2) & (neighborCount != 3))] = 0
    #nextState[np.where(neighborCount == 3)]= 1
    #B36/S23
    nextState[np.where((neighborCount != 2) & (neighborCount != 3))] = 0 
    nextState[np.where(neighborCount == 3)] = 1
    nextState[np.where((neighborCount == 6) & (currentState == 0))] = 1
    return nextState

I’ve commented out the Life lines of code so that I can switch back and forth easily and added in the HighLife code. When I first did this I made what seemed like a straightforward change of:

def updateState(currentState): 
nextState[np.where((neighborCount == 3) | (neighborCount == 6))] = 1

however the replicator didn’t work. It took me a while to figure out what was going on and how to correctly implement the rule. What I was missing is that only dead cells with 6 neighbors should become living cells and living cells with 6 neighbors should die. My first attempt didn’t look at the current state but just made the cell live in the next generation. Once I understood this it still took a while to figure out how to correct it. Fortunately the Numpy where function can look at more than one array at a time so the line

def updateState(currentState): 
nextState[np.where((neighborCount == 6) & (currentState == 0))] = 1

looks at both the number of neighbors and the current state of the cell so that only dead cells become living.
Everything is easy once you know how.

So once I had the new HighLife code working I was able to create the replicator

replicator
and let it do its thing. As you can see one replicator first becomes two and then four.

replicatorgif

Fourier Life

Filed in Cellular Automata | Game of Life 1 Comment

As I mentioned in my post on Amazon’s web services one of the things I’ve been thinking about is a way to do analysis on the GOL universe to find interesting things even if I’m not watching. Poking around the web turned up Fourier Life which discusses an automated method of finding replicating structures in cellular automata. As discussed there one of the most interesting things about cellular automata is the emergence of self replicating structures from random fields of cells. This obviously has interesting similarities to the emergence of biological life and is one of the areas that I’m exploring as well. The method used is to plot the percentage of living cells vs. time and to look for periodic fluctuations. When replication occurs the number of cells increases and decreases with regularity and this can be detected by running a Fourier analysis on the sequence. If replicators are present then the analysis show peaks at the replication rate of the structures and indicates there is more than just random noise present in the field of cells. This seems like a good start to a status monitoring routine that can watch what’s happening even if I’m not around. The images below illustrate this process and are the work of Sean Murphy from http://stm1968.tripod.com/fourierlife/. A catalog of search programs to aid in finding interesting patterns has also been put together by David Eppstein at http://www.ics.uci.edu/~eppstein/ca/search.html.

One thing interesting to note is that it’s been known for a long time that Conway’s rules don’t produce self replicators from random fields of cells but other rules do. I find this odd since Conway’s rules are Turing complete and should be able to perform any computation that any other rule set does. Fortunately the software I’ve written makes it easy to use other rule sets and I’ll be exploring those as well. Considering that John Conway himself stated the following about HighLife (rule B36/S23) I’ll likely explore that next.

“It seems to me that ‘B36/S23’ is really the game I should have found, since it’s so rich in nice things.”

Buttons

Filed in Python | Tkinter Leave a comment

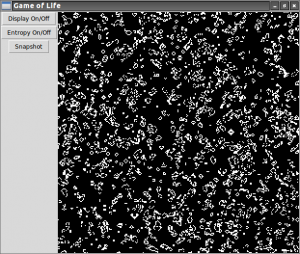
While I was doing the profiling it became clear that a large part of the processing is devoted to just displaying images on the screen. Of course the graphical display is useful but there are times where I want to leave the program running for long periods of time and won’t be looking at it at all. So for that reason I decided to learn how to turn the display on and off. The screen capture below shows the current state of the graphical display.

2014-01-09-011914_622x527_scrot

As you can see I’ve added three buttons (without a great deal of aesthetic care) with one of the buttons giving the option to turn the display on or off. I’ll add some profiling numbers but with the display off the update rate is about 3 times faster than when the display is on. Alternately you can get the same update rate for a third of the processor load. Adding the option to disable the display required another architectural change to the code much like changing to the Tkinter graphical display. However, doing so made it very easy to add other options that I’ll talk about later.

The standard way of making the status of variables available to all Python modules is to declare them in a configuration file that gets imported into the modules that use those variables. I took the variables I’ve defined (number of rows, columns, update rate, etc.) and moved them into a separate file, gol_config.py that I then import as config.

The first step is to create the button in the main module gol.py:

 #display on/off button
 bttn_display = tk.Button(root, text="Display On/Off", command=gol_defs.display_state)
 bttn_display.pack()

This creates the button and defines the function, gol_defs.display_state, called when the button is pressed. This function is very simple and just changes the state of the Boolean variable in gol_configs.py

 def display_state():
     #change state of display to turn it on or off
     config.display = not(config.display)

Then in the main program loop the value of config.display is checked and used to control whether the display is updated or not.

if config.display == True:
    #create state image
    pgm = gol_defs.write_file(currentState)
    state = tk.PhotoImage(data=pgm)
    #set image size
    state = state.zoom(width, height)
    tkimg[0] = state
    #update label with image
    label.configure(image = tkimg[0])


TOP